Showing posts with label dessert. Show all posts
Thursday, December 29, 2011
Salted Caramel Dark Chocolate Mousse - Wine Flight Pt. 4
On the morning of Christmas Eve I woke up feeling a little risque. I looked at myself in the mirror, and I said, "Laura, you're going to be a bad ass today. You're going to put sugar and water in a saucepan, and watch it turn into a beautiful brown bubbly caramel. But you know what else, you crazy rebel? You're going to do it without a candy thermometer."
And I did.
And it turned out SO PERFECT.
And it was my first caramel, ever!
And then I put dark chocolate into it, and I ate a spoonful and died and went to heaven.
But then I didn't stop there! I added eggs and turned it into a mousse, and topped it with salt.
Are you still breathing?
I barely am.
You know those desserts you taste and they are so mind-blowingly good you fall to the floor after the first bite? If you don't know those desserts, make this mousse so you can understand what passing out over caramel and chocolate is all about. Even if you don't want to make a mousse, just make the chocolate caramel and drink it, or drizzle it over ice cream or brownies. Whatever you prefer.
It's worth it, promise!
Dark Chocolate Covered Pomegranate Seeds - Wine Flight Pt. 4
A dessert that gives you double the antioxidants?!
Say whaaaaa?
I know. You're welcome!
And the best part?
The juices from the poms go pop in your mouth.
It's a juicy chocolate little morsel!
Perfect for the holidays, and perfect for everyday.
Thursday, December 15, 2011
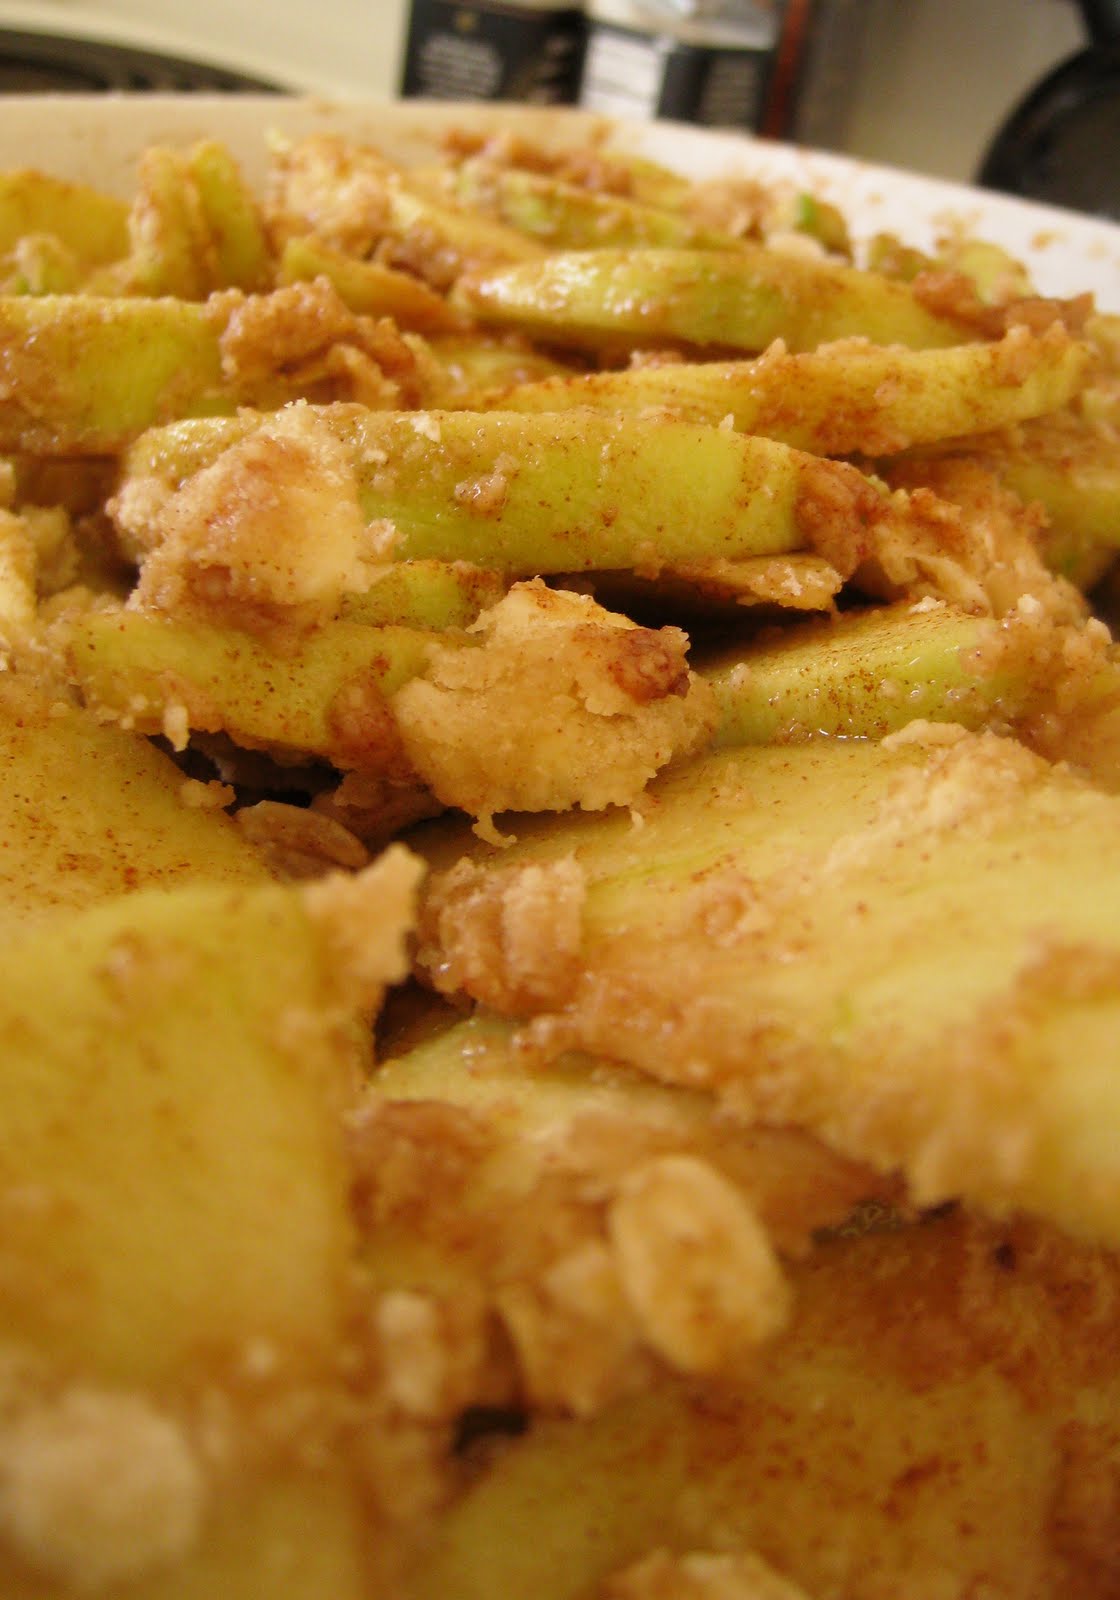
Cranberry Apple Crisp
Round two of our epic battle of the berries, is...
..the rustic,
..the sweet,
..the tart,
..the beautiful and divine...
the CRANBERRY APPLE CRISP!
So remember how I told you to give yourself a gift this holiday season, and let it be the pear cranberry and gingersnap crumble?
I changed my mind.
Let it be the pear cranberry and gingersnap crumble AND this cranberry apple crisp.
You need both.
It's no big deal.
Just make them and sit in the kitchen and eat them both straight out of the oven. With ice cream. By yourself.
Or you can share, I guess.
I mean it is Christmas, after all.
Labels:
apples,
cranberries,
dessert,
holidays
Wednesday, December 14, 2011
Pear Cranberry and Gingersnap Crumble
I'm excited to announce there is about to be a show-down in this here apartment.
And maaan, this is a good match-up if there ever was one!
Are you as excited as I am?
You should be, dang it!
First up...
Pear, cranberry and gingersnap crumble. Oozes holidays, right? It's beautiful and perfect in every way.
I mean that. It's perfectly balanced, down to the sweetness from the pears, the tartness from the cranberries, the spices from the gingersnaps, and the textures from the crumble.
Are you looking to give yourself a gift this Christmas?
Let it be this crumble.
Trust me.
And maaan, this is a good match-up if there ever was one!
Pears and cranberries and crumble heaven
VS
Apples and cranberries and crisp magicAre you as excited as I am?
You should be, dang it!
First up...
Pear, cranberry and gingersnap crumble. Oozes holidays, right? It's beautiful and perfect in every way.
I mean that. It's perfectly balanced, down to the sweetness from the pears, the tartness from the cranberries, the spices from the gingersnaps, and the textures from the crumble.
Are you looking to give yourself a gift this Christmas?
Let it be this crumble.
Trust me.
Labels:
cranberries,
dessert,
holidays,
pears
Sunday, December 11, 2011
Salted Double Chocolate Peanut Butter Cookies
Double Chocolate.
Peanut Butter.
Course Salt.
Enough said?
Enough said. (Make them and see for yourself!)
Saturday, December 10, 2011
Dark Chocolate-Dipped Coconut Macaroons
My mom told me back in the day, coconut macaroons were all the rage. I'm not sure when back in the day was, but I'm guessing it was when big hair and big glasses were all the rage, too. Mom pulled those off amazingly well. I have pictures to prove it.
Coconut macaroons used to be my dad's all time favorite cookie, so my mom would make them for him every so often. Being the huge coconut fan that I am, too, when mom pulled up this new recipe, we knew we were going to incorporate these into our holiday baking.
These cookies are several things. 1. so stinkin' easy to make. 2. insanely scrumptious. 3. dangerously addicting.
No, seriously. Try to eat just one. Doesn't work.
Confession: Mom and I gave most of these away as gifts, keeping less than one dozen for her and my dad and me and Eric. Since I knew they were dad's favs, I told her I'd just take two home. I left their house and ate both in my car before I even got on the freeway. Oopsies...
sorry, Eric.
Monday, November 7, 2011
Pumpkin-Orange Cheesecake
After spending the first few hours of my Saturday morning reading alone on the couch(not complaining), I got a call from my mom wondering what I was up to. After quickly realizing I didn't want to spend the day couped up alone in my apartment, my mom and I decided to use the weekend to cook and bake together (pretty much my favorite kind of weekend). Thirty minutes later, I was off to Arlington.
A few weeks ago, my dad found a cheesecake recipe in the new Sunset magazine. Once he read the words 'salted caramel' he HAD to have it, and has been desperate for my mom and I to make it ever since. I'm pretty sure I saw drool on the pages when he handed us the recipe. (It happens to the best of us).
When we got home from the grocery store, after getting everything we needed for the weekend, I suggested that we have a glass of wine while we bake. My mom simply replied, "Well, YEAH. You think Julia never drank wine while SHE baked? Come on! You've heard her voice in some of those videos!"
..insert mine and mom's imitations of Julia's voice here...
Alright, so I've come to a few conclusions. Either Julia never really drank while she baked OR she holds a glass of wine much better than
We had a few mishaps. No big deal.
So I may have forgot to set the cream cheese and eggs at room temperature before we got everything started. That's okay. We just put everything on pause for thirty minutes or so and drank more wine.
So I almost forgot to add the pumpkin to our pumpkin cheesecake. Meh. I caught it just in time! (Mom told me no more wine til' dinner.)
So my mom wrapped the baking pan in foil far before she was supposed to. Didn't matter!
Because our cheesecake turned out beautiful and perfect and beautiful!
Tis' the season! The decadent holiday baking has commenced!
Sunday, October 23, 2011
Banana Cream Pie + 3 Years
Today is a special day.
Today marks exactly three years since mine and Eric's love story first began(And let me tell you, it's one for the books).
Three years, people. We're kind of a big deal now.
So I feel like today is the perfect day to document how Eric and I met, since I love the story oh-so-much, and the many reasons why I love and appreciate him. Sorry in advance for the mushy gushy sappiness, but sometimes, you just gotta do it.
It was fate. It really was!
It tooks weeks, maybe even months, for me to decide that I would be studying abroad in Granada, Spain. I knew Spain was the country from the get-go, but Granada took some time to figure out. I thought for sure it was going to be Sevilla, I was set on it even, but then a professor of mine announced to the class one day while talking about studying abroard, that if we were choosing to go to Spain, DON'T go to Sevilla. My heart was broken. I didn't have to listen to her, but I did. She said it had become "Americanized" and that if our goal was to learn and practice speaking Spanish, it wouldn't happen there. After much discussion and thought, I decided on Granada.
Eric's selection process was purely random. Granada, Spain. Boom. Done.
So a girl attending school in Bellingham, Washington and a guy going to school in Irvine, California end up choosing the same country, the same city and the same program. (Like I said, it was fate.)
Eric was there a month before me for a summer program, and then shortly after my group arrived in September, our program had the opportunity to take a weeklong excursion to Morocco. We were both lucky enough to be able to go, and this is where it first began.
We were "camping" out in the Sahara Desert, and the Berbers had cooked us food and were providing us entertainment in a big tent one night. There was music and dancing and laughing. I was sitting at a table, not feeling well, but watching some of my friends dance. I noticed Eric right away. He picked up one of the little Berber boys and had him on his shoulders and was dancing around with him. The boy absolutely loved it (and I thought it was pretty adorable, too). Eric and I kept stealing glances at each other. I felt an instant connection. (I think/hope he did too.)
We spent the next few months getting to know each other through coffee dates, dinners, walks around Granada, nights out drinking and dancing, so many tapas, and excursions around Spain. I always tell everyone being in Spain was the best three months of my life so far, and Eric had a lot to do with that. At the end of our time there, we decided to give a long distance relationship a try.
And three years later, here we are.
I never expected to meet my perfect match in Spain. But love creeps up on you when you least expect it.
I'm SO lucky! Why? Because....
-He let's me call him ridiculous things like, 'bubs' and 'nunners' and 'booj'. (Don't even ask)
-He rubs my head until I fall asleep when I have migraines.
-He is ALWAYS positive and reassuring when I am being a negative nancy.
-He loves my cooking and baking.
-He watches the Food Network with me.
-He tells me I'm beautiful even when I feel at my worst.
-He tells me I'm beautiful when he knows I put a little extra effort to look cute.
-He protects me when I'm scared.
-He believes in me when I don't believe in myself.
-He pushes me to challenge myself and helps me to be a better me.
-He lets me pinch his boobies almost everyday, even though he hates it.
-He loves being weird and silly with me and loves that I'M weird and silly.
-and so on and so on...
They say a way to a man's heart is through food. Well, I've already won Eric's heart, but I still like to win him over again and again and again through my cooking and especially, baking.
Awhile ago, I asked Eric what his all-time favorite dessert was. After a little thinking, banana cream pie was the verdict. So for this special day, I wanted to make him a completely homemade banana cream pie. No pre-made pie crust, no vanilla pudding packets, no Cool Whip....we're talking 100% homemade, because he deserves the very best.
Happy Anniversary, Eric.
I hope you love your pie today (it was made with so much love!)
Thank you for being an amazing man and making me feel like the luckiest girl in the world.
Te quiero para siempre.
Banana Cream Pie
(Source: Baking: From My Home to Yours by Dorie Greenspan)
For the Custard:
2 cups whole milk
6 large egg yolks
½ cup (packed) light brown sugar, pressed through a sieve
1/3 cup cornstarch, sifted
Pinch of salt
1 teaspoon pure vanilla extract
3 tablespoons cold unsalted butter, cut into bits
3 ripe but firm bananas
1 9-inch single crust made with Good for Almost Everything Pie Dough
fully baked and cooled
For the Topping:
1 cup cold heavy cream
2 tablespoons confectioners’ sugar, sifted
1 teaspoon pure vanilla extract
2 tablespoons sour cream
Dorie's Pie Crust:
Makes two 9-inch pie crusts (I halved the recipe since I only needed one)
3 cups flour
1/4 cup sugar
1 1/2 tsp salt
12 ounces cold butter, cut into pieces
6 to 8 tablespoons, ice water
To make crust:
Add flour, sugar and salt to the food processor bowl attachment on your Cuisinart Stand Mixer. Pulse for 1 to 2 seconds to combine. Scatter the butter pieces over the dry ingredients. Pulse, in one-second intervals, 8 to 10 times until it forms a sandy texture, with some pieces being about the size of a pea.
Sprinkle 6 tablespoons of ice water over the mixture. Pulse until it forms a rough ball (add additional water if needed, 1 tablespoon at a time). Turn dough onto a counter or cutting board. Divide and form each half into a disk. Wrap tightly with plastic wrap and refrigerate at least 30 minutes or overnight (be sure to take out a few minutes beforehand so it will be easier to roll out).
To Make the Custard: Bring the milk to a boil.
Meanwhile, in a large heavy-bottomed saucepan, whisk the yolks together with the brown sugar, cornstarch, cinnamon, nutmeg and salt until well blended and thick. Whisking without stopping, drizzle in about ¼ cup of the hot milk – this will temper, or warm, the yolks so they won’t curdle – then, still whisking, add the remainder of the milk in a steady stream. Put the pan over medium heat and, whisking constantly (make sure to get into the edge of the pan), bring the mixture to a boil. Boil, still whisking, for 1 to 2 minutes before removing from the heat. Whisk in the vanilla extract. Let stand for 5 minutes, then whisk in the bits of butter, stirring until they are fully incorporated and the custard is smooth and silky. You can either press a piece of plastic wrap against the surface of the custard to create an airtight seal and refrigerate the custard until cold or, if you want to cool the custard quickly – as I always do – put the bowl into a large bowl filled with ice cubes and cold water and stir occasionally until the custard is thoroughly chilled, about 20 minutes. (If it’s more convenient, you can refrigerate the custard, tightly covered,for up to 3 days.)
When you are ready to assemble the pie, peel the bananas and cut them on a shallow diagonal into ¼-inch-thick slices. Whisk the cold custard vigorously to loosen it, and spread about one quarter of it over the bottom of the piecrust – it will be a thin layer. Top with half of the banana slices. Repeat, adding a thin layer of pastry cream and the remaining bananas, then smooth the rest of the pastry cream over the last layer bananas.
To Make the Topping: Working with a stand mixer fitted with the whisk attachment or with a hand mixer in a large bowl, beat the cream until it just starts to thicken. Beat in the confectioner’s sugar and vanilla and continue to beat until the cream holds firm peaks. Switch to a rubber spatula and gently fold in the sour cream.
To Finish: Spoon the whipped cream over the filling and spread it evenly to the edges of the custard. Serve, or refrigerate until needed.
Tuesday, October 11, 2011
Apple Crisp
I have a sad, but serious confession.
I'm demented and have major issues. Major.
It all started when I was just a little kid. In school when teachers would ask my parents something important they should know about their daughter, the answer was always the same: "Ms. Teacher, Laura's a freak." Okay okay, they referred to me as a "perfectionist," but they/I know what I really am.
In elementary school, I would pull serious almost all-nighters working on art projects and pop-up books and "ME" posters. I would rewrite my papers if my handwriting looked ugly. Coloring and cutting and drawing and pasting....hours and hours of precision, people. What ten year old cares if their cutting looks too jagged?
As the years went on, these issues translated into my hobbies and sports and everthing I did and tried. And now, I hate to admit, I'm even a whack job in the KITCHEN. Stand next to me as I'm chopping or dicing or julienning anything, and I promise you'll want to grab the knife out of my hand and stab me with it. BUT I bet you will never see more evenly and beautifully diced produce!
You know how most recipes have a prep time? Yeah, those don't apply to me. I have to add like an extra hour.
So how does this relate to my glorious apple crisp? I had to PEEL and CORE and CUT SIX BIG APPLES! Normally I can deal with my time-consuming ways, but whoa, even this was too much for me. Don't they make apple peeling machines? I need one stat.
At least I can say all my time and hard work was worth it, because I made another epic warm, cozy fall dessert.
I'm going to go eat it all now (then I'll be weird AND fat). Kbye!
Apple Crisp
(recipe taken from Joy the Baker)
Filling:
5 to 6 medium-size granny smith apples, peeled, cored and cut into 1/4-inch slices. (About 7.5 cups)
3 tbsp granulated sugar
1.5 tsp cinnamon
Topping:
1 1/3 cups all-purpose flour
1 1/3 cups lightly packed brown sugar
1/2 tsp ground cinnamon
1 stick unsalted butter, well-softened
2/3 cup finely chopped pecans (optional)
1/3 cup quick oats
Preheat the oven to 350. Generously grease an 8×8 baking pan with butter.
Place a layer of apple slices in the bottom of the pan and dust with sugar/cinnamon mixture. Continue layering apples and dusting with cinnamon/sugar until done. Toss the apple mixture until evenly coated in cinnamon sugar. The apples should be just about to the top of the pan (they will cook down).

For the topping, place the flour, brown sugar, nuts, cinnamon and oats in a large bowl and stir well with a wooden spoon. Work the butter into the mixture with your fingertips until evenly distributed. Take one full handful of the topping and toss it into the sugared apple mixture. Spread the rest of the topping evenly over the apples. (I usually end up with a dough-like topping that I just lay on top of the apples).
Bake the crisp in the dish on a baking sheet on the center oven rack until the topping is crunchy and the apples are bubbling, 55-60 minutes.
Serve hot!
I'm demented and have major issues. Major.
It all started when I was just a little kid. In school when teachers would ask my parents something important they should know about their daughter, the answer was always the same: "Ms. Teacher, Laura's a freak." Okay okay, they referred to me as a "perfectionist," but they/I know what I really am.
In elementary school, I would pull serious almost all-nighters working on art projects and pop-up books and "ME" posters. I would rewrite my papers if my handwriting looked ugly. Coloring and cutting and drawing and pasting....hours and hours of precision, people. What ten year old cares if their cutting looks too jagged?
As the years went on, these issues translated into my hobbies and sports and everthing I did and tried. And now, I hate to admit, I'm even a whack job in the KITCHEN. Stand next to me as I'm chopping or dicing or julienning anything, and I promise you'll want to grab the knife out of my hand and stab me with it. BUT I bet you will never see more evenly and beautifully diced produce!
You know how most recipes have a prep time? Yeah, those don't apply to me. I have to add like an extra hour.
So how does this relate to my glorious apple crisp? I had to PEEL and CORE and CUT SIX BIG APPLES! Normally I can deal with my time-consuming ways, but whoa, even this was too much for me. Don't they make apple peeling machines? I need one stat.
At least I can say all my time and hard work was worth it, because I made another epic warm, cozy fall dessert.
I'm going to go eat it all now (then I'll be weird AND fat). Kbye!
Apple Crisp
(recipe taken from Joy the Baker)
Filling:
5 to 6 medium-size granny smith apples, peeled, cored and cut into 1/4-inch slices. (About 7.5 cups)
3 tbsp granulated sugar
1.5 tsp cinnamon
Topping:
1 1/3 cups all-purpose flour
1 1/3 cups lightly packed brown sugar
1/2 tsp ground cinnamon
1 stick unsalted butter, well-softened
2/3 cup finely chopped pecans (optional)
1/3 cup quick oats
Preheat the oven to 350. Generously grease an 8×8 baking pan with butter.
Place a layer of apple slices in the bottom of the pan and dust with sugar/cinnamon mixture. Continue layering apples and dusting with cinnamon/sugar until done. Toss the apple mixture until evenly coated in cinnamon sugar. The apples should be just about to the top of the pan (they will cook down).
For the topping, place the flour, brown sugar, nuts, cinnamon and oats in a large bowl and stir well with a wooden spoon. Work the butter into the mixture with your fingertips until evenly distributed. Take one full handful of the topping and toss it into the sugared apple mixture. Spread the rest of the topping evenly over the apples. (I usually end up with a dough-like topping that I just lay on top of the apples).
Bake the crisp in the dish on a baking sheet on the center oven rack until the topping is crunchy and the apples are bubbling, 55-60 minutes.
Serve hot!
Wednesday, October 5, 2011
Pumpkin Pie Bars
I love/adore/go completely crazy over fall. It's my absolute favorite season. I love the holidays, the colors, the smells, the flavors, the crisp air, the cozy days and nights. Fall is gorgeous and tastes amazing.
I just bought Eric and I tickets the Elysian Brewing's 7th Annual Great Pumpkin Beer Festival in Seattle. I am SO stoked! Pumpkin beers (some of them actually brewed INSIDE of a pumpkin), local food trucks (major YUM!), adorable souvenir pumpkin glasses, and everyone dresses in pumpkin attire! I need to go find something orange, stat!


(Photos courtesy of Beer Festival website - Elysian Brewing)
On another exciting fall note, my two favorite cupcake places in Seattle have some fantastic-sounding flavors of the month I can't wait to try. Trophy Cupcakes: "We're celebrating Washington's Apple Harvest and National Caramel Month with our newest seasonal flavor, Caramel Apple! The cake boasts local, organic granny smith apples and warm fall spices topped with housemade caramel infused buttercream, toasted pecans, and a drizzle more of homemade caramel." I'm kind of freaking out that sounds so amazing.
I'm sitting on the couch right now all bundled up in a blanket, drinking hot spiced tea and thinking about gorging on the PUMPKIN PIE BARS that I just pulled out of the oven. Does it get any more fall than that? Oh, did I mention a pumpkin spice candle is burning on the coffee table in front of me? Told you I'm obsessed.
Back to pumpkin pie bars.
Um, yummy heaven, right?
Growing up, pumpkin desserts, especially pumpkin pie, never really appealed to me. I think it's because I have vivid memories of my mother baking a pumpkin pie every year for Thanksgiving, taking big bites and chewing a few times, and then before swallowing, she'd show me her lovely colored mouthful of chewed up pumpkin pie and say, "Look! Baby poop!" Yup...
Well, I believe enough time has passed now for me to get over that trauma, because I can never wait until pumpkin season arrives. Bring me a pumpkin dessert and we'll be best friends for life. Thank you.
This recipe is, once again, from my homegirl Joy the Baker..and she's done it again. Total success. AND! I used my new and beautiful standup mixer! Double success!
Pumpkin Pie Bars
1-1/3 cups flour (I use unbleached all purpose white flour)
3/4 cup granulated sugar, divided (organic, brown granulated sugar)
1/2 cup packed brown sugar
3/4 cup (1-1/2 sticks) cold butter or margarine (unsalted)
1 cup old-fashioned or quick-cooking oats, uncooked
1/2 cup chopped walnuts
1 pkg. (8 oz.) cream cheese, softened (I used fat free)
3 eggs
1 can (15 oz.) pure pumpkin
1 Tbsp. pumpkin pie spice
1 teaspoon vanilla extract
2 teaspoons bourbon (optional)
HEAT oven to 350°F. Line 13×9-inch pan with foil, with ends of foil extending over sides; grease foil. Mix flour, 1/4 granulated sugar and brown sugar in medium bowl; cut in butter with pastry blender or 2 knives until mixture resembles coarse crumbs. Stir in oats and nuts.
RESERVE 1 cup oat mixture; press remaining onto bottom of prepared pan. Bake 15 min. Beat cream cheese, remaining sugar, eggs, vanilla, bourbon, pumpkin and spice with mixer until well blended. Pour over crust; sprinkle with reserved crumb mixture.
BAKE 25 min.; cool 10 min. Use foil to transfer dessert from pan to wire rack; cool completely.
Wednesday, August 17, 2011
Donut Peaches and (Makeshift) Peach Cobbler
Peaches are in season, and I picked up some amazing looking donut and yellow peaches at the Ballard Farmer's market last Sunday. They might honestly be the best peaches I've ever eaten in my life. So sweet and perfect - one bite and the juices are running down my chin and fingers. This is love.

(photo cred. Cook Almost Anything)
Alright, about this so-called "makeshift peach cobbler" stuff...bet you're wondering what the heck I'm talking about. It's an unbelievably fast/deliciously sweet, juicy, crumbly, crispy super YUM-O peach dessert that I made twice in one week. Maybe two nights in a row. Who's keeping track, anyway? All I know for sure is that I could eat this every day for all three meals and I'd be fine.
"Peach Cobbler"
(Joy the Baker)
1 ripe peach
1/4 cup all-purpose flour
1/4 cup packed light brown sugar
3 tablespoons old-fashioned oats
1/4 teaspoon ground cinnamon
pinch of salt
1 tablespoon shredded coconut
1 tablespoon slivered almonds
2 tablespoons cold unsalted butter, cubed
Place a rack in the center of the oven, and preheat oven to 350 degrees F.
Slice a peach in half and remove the pit. With a small spoon, scoop out the the dark red pit center, creating just a bit more room for the crumble topping.
In a small bowl, whisk together flour, brown sugar, oats, cinnamon, salt, coconut, and almonds. Add butter and, with your fingers, work the butter into the dry ingredients. Quickly break up the butter until it is well combined. Some of the butter bits will be the size of oat flakes, others will be the size of small peas.
Place peach halves, cut side up, in a small, oven-safe dish. Top each peach half with a generous portion of crumble topping. Heap it on!
Bake for 20 minutes, until topping is golden brown. Remove from the oven and serve warm with vanilla ice cream or cold milk. Peaches are best served warm from the oven.
Tuesday, August 16, 2011
Brown Butter Banana Strawberry Bread
I love baking bread. I adore bananas in desserts. Strawberries are in season, and completely irresistable. And who can say no to the insanely good smell of browned butter sizzling in a pan?
When I found this bread recipe on Joy the Baker's blog, there was no doubt in mind I had to make it, and as soon as possible. Who would've ever thought of adding strawberries to banana bread? Not me. Delicious. Genius. SO YUM.
Thank you, Joy. You are a goddess in my mind.
Brown Butter Banana Strawberry Bread
(inspired by The Amateur Gourmet)
6 ounces unsalted butter, melted and browned to just over 1/2 cup of butter
2 cups all-purpose flour
3/4 cup brown sugar
1 teaspoon baking soda
1/2 teaspoon salt
3/4 teaspoon ground cinnamon
2 large eggs
1 teaspoon pure vanilla extract
1/4 cup plain yogurt (any fat content) or buttermilk
1 1/4 cup mashed banana (from about 3 medium bananas)
1/2 cup diced strawberries plus 1 strawberry very thinly sliced, for topping
Place a rack in the center of the oven and preheat to 350 degrees F. Grease and flour a 9×5-inch loaf pan and set aside.
Melt butter in a saucepan over medium heat. Butter will begin to foam and crackle as it melts. When the crackling subsides, the butter will begin to brown. Swirl the pan as the butter cooks. When the butter browns and begins to smell nutty, remove the pan from the flame and transfer the butter to a small bowl. Taking the butter out of the hot saucepan will stop the butter from overcooking and burning. Set aside to cool.
In a large bowl, whisk together flour, sugar, baking soda, salt, and cinnamon.
In a medium bowl, whisk together eggs, vanilla extract, and yogurt or buttermilk. Whisk in the mashed bananas. When butter has cooled, whisk in the browned butter.
Add the wet ingredients, all at once to the dry ingredients. Fold together, making sure to scrape the bottom of the bowl to reveal any hidden pockets of flour. Fold in the diced strawberries. Fold together ingredients, but try not to over stir.
Spoon batter into prepared pan and top with thinly sliced strawberries.
Bake for 50 minutes to 1 hour, or until a skewer inserted into the center of the loaf comes out clean. Remove from the oven and allow to rest in the pan for 15 minutes, before inverting onto a wire rack to cool completely.
Labels:
bananas,
bread,
dessert,
strawberries,
summer
Monday, August 1, 2011
Birthday Cake = French Chocolate Cake with Chocolate Ganache and Raspberry Compote
This year was dad's 60th birthday, so we decided to do something extra fun and special. We rented a cabin by Mt. Baker and spent the weekend relaxing and having fun in a beautiful place. Because it was such a special birthday, I wanted an extra special cake that I knew dad would absolutely LOVE. Dark chocolate and raspberries immediately popped into my head as a must. I had just finished reading David Lebovitz's The Sweet Life in Paris, which included a mouth-watering french chocolate cake recipe. Made with dark chocolate, it's meant to be smaller, denser, and much richer in flavor. How could I resist? I thought it would look beautiful with an equally rich ganache and drizzled with a sweet/tart rasberry compote. The result was perfect - the cake was a hit and most important of all, dad LOVED IT! I love a success.
French Chocolate Cake
(courtesy of David Lebovitz)
9 ounces bittersweet chocolate, chopped (I used Lindt)
8 tablespoons unsalted butter
1/3 cup sugar
4 large eggs, at room temp, separated
2 tablespoons flour
Pinch of salt
Preheat oven to 350 degrees. Line loaf pan or cake pan with parchment paper.
In a large bowl set over a pan of simmering water, heat the chocolate and butter together just until melted and smooth.
Remove from heat and stir in half the sugar, then the egg yolks, and flour.
Using an electric mixer or a whisk, begin whipping the egg whites with the salt. Keep whipping until they start to form soft, droopy peaks. Gradually whip in the remaining sugar until the whites are smooth and hold their shape when the whisk is lifted.
Use a rubber spatula to fold one-third of the egg whites into the chocolate mixture, then fold in the remaining egg whites just until the mixture is smooth and no visible white streaks remain.
Scrape the batter into pan, smooth on top, and bake for about 35 minutes, just until the cake feels slightly firm in the center. Do not overbake. Let cool in the pan before serving.
Chocolate Ganache
3/4 cup mini semisweet chocolate chips (I used chocolate chunks)
1/4 cup heavy cream
Put chocolate chips in a small bowl. Bring cream to a simmer in a small heavy saucepan. Pour cream evenly over chocolate. Let stand for one minute to soften, then stir until smooth. If frosting is too loose to spread, let it sit at room temperature for 10 to 30 minutes, stirring occasionally, frosting will continue to thicken as it stands.
Raspberry Compote
2 pints raspberries
1 -2 tablespoon water
Sugar to sweeten
Allow to boil in saucepan until desired thickness.
Labels:
chocolate,
dessert,
rasberries,
summer
Thursday, June 23, 2011
Strawberry Rhubarb Shortcakes
When I was in third grade, my parents announced to my brother and I that we were moving for the first time. I don't remember this news being very tragic to me at the time; although when it comes to my younger years my memory is a bit blurry. Sioux Falls, South Dakota would become our new home for only about 18 short months. If it weren't for the extreme weather, I'd say Sioux Falls truly had it going on: great neighbors, amazing friends, community swimming pool, bike paths, and most importantly, an epic big blue house.
Justin and I had our own unique rooms, with different colored carpet, built in cabinetry with space for a television, window seats, etc. Our bathroom was big and had TWO sinks, so we didn't have to share; we were in heaven. We were thrilled about all of us, but I can honestly say we were probably most excited over the laundry shoot. I don't know why a nine and ten year old thought a laundry shoot was so enthralling, but we truly did find it fantastic!
While the inside of the house was something to write home about, the backyard looked like something out of a Better Homes & Gardens magazine: a patio, flowers upon flowers upon flowers, trees, a huge open grassy area, and a cute little garden. What more could you ask for, really?
If my memory serves me correctly, the two vegetables we yielded the most from were green beans (of course I would remember those) and rhubarb. This is where my love and appreciation for rhubarb all started. Mom would use it from the garden and make strawberry rhubarb pies, and still to this day that it my favorite kind of pie.
After eating Cupcake Royale's cupcake of the month, I felt inspired to use rhubarb, and knew I could find it local and organic at the Ballard Farmer's market. Low and behold, I found some amazing looking "strawberry rhubarb" and I also bought a pint of fresh strawberries then went to work to find the perfect recipe.
I decided on a Strawberry Rhubarb Shortcake recipe from Bon Appetit, which consists of baking homemade sweet biscuits and a strawberry rhubarb compote. I also bought whipping cream and whipped it up myself, sweetening it using pure vanilla extract for topping.
Strawberry Rhubarb Shortcakes:
Compote
4 cups 3/4-inch-thick slices fresh rhubarb (about 1 1/2 pounds)
3/4 cup sugar
2 tablespoons water
2 tablespoons strawberry preserves
1 teaspoon minced orange peel
1/4 teaspoon ground allspice
1 1-pint basket strawberries, hulled, thickly sliced
Combine first 5 ingredients in heavy large saucepan or Dutch oven. Bring to boil over medium heat, stirring until sugar dissolves. Reduce heat to medium-low; cover and simmer until rhubarb is tender but some pieces remain intact, about 7 minutes. Remove from heat and add allspice. Cool completely. Stir in strawberries. Cover and refrigerate until well chilled, at least 3 hours or overnight.
Biscuits
2 1/4 cups all purpose flour
6 tablespoons sugar
4 1/2 teaspoons baking powder
1 1/2 tablespoons minced orange peel (orange part only)
1/4 teaspoon salt
9 tablespoons chilled unsalted butter, cut into pieces
3/4 cup plus 3 tablespoons chilled whipping cream
Position rack in center of oven and preheat to 400°F. Combine first 5 ingredients in medium bowl. Add butter and cut in using pastry blender or rub with fingertips until mixture resembles coarse meal. Add 3/4 cup plus 3 tablespoons cream and stir until dough comes together.
Turn out dough onto lightly floured work surface and knead until smooth, about 6 turns. Flatten dough to 3/4-inch-thick round. Cut out rounds using 2 3/4-inch-diameter plain or scalloped cookie cutter. Gather dough scraps and shape into 3/4-inch-thick round. Cut out additional dough rounds.
Transfer rounds to heavy large ungreased baking sheet. Bake until biscuits are puffed and golden, about 23 minutes. Transfer biscuits to rack and cool slightly.
I cut the biscuits in half and warmed them in the microwave for 25 seconds, then spooned the cold compote on top and a dollop of whipped cream.
This truly is an incredible dessert.
PS. Please resist the urge right now to laugh/judge/scoff at my "whipped" cream. I know it looks pathetic, but this was after it sat a day in my fridge AND I only whipped for like 5 hours BY HAND in the first place. Sheesh.
Labels:
dessert,
rhubarb,
strawberries,
summer
Tuesday, May 31, 2011
Chocolate Banana Bread With Cinnamon/Sugar and Chocolate Topping
Is that title an irresistible mouthful, or what?
I am salivating just writing it. Not to mention it is baking to perfection right now, and the smell alone emanating from the oven is making me "go bananas" with anticipation.
I have a real thing for breads/desserts with bananas, chocolate and/or peanut butter as its main ingredients. Any combination will do just fine. I seriously spend a few nights per week scouring the internet for recipes. Google Search: Banana Peanut Butter/Chocolate ______, then click! click! click! on links in search if the most delicious concoctions out there. So, it's no surprise that this particular banana bread recipe called my name. I saw it and I said, "you are mine, alllllll mine." And the rest is history.
I found this recipe from the awesome new blog I discovered called Orangette (more about that later). Here it is, in all it's glory. And I must say, it a complete cinch to make!
Chocolate Banana Bread With Cinnamon & Sugar Topping:
3 ripe bananas
2 large eggs
1 1/2 cups unbleached flour
1 cup granulated sugar
1 tsp. baking soda
2 tsp. cinnamon
1 tsp. pure vanilla extract
1 cup semisweet chocolate chips
For topping:
2 tbsp. granulated sugar
1/8 tsp. cinnamon
Preheat the oven to 375 degrees. Butter or spray 8 inch bread pan.
In medium mixing bowl, mash bananas well with a fork. Add the eggs and stir well to combine. Add the flour, sugar, baking soda, cinnamon and vanilla. Add 3/4 cup of chocolate chips and stir. Pour the batter into prepared pan.
In a small bowl, stir together topping ingredients. Sprinkle the mixture evenly oven the batter in the pan and top with remaining 1/4 cup chocolate chips.

Bake for 35-40 minutes (although mine took quite a while longer), OR until a toothpick comes out clean. Let cool for 15 minutes.
I am salivating just writing it. Not to mention it is baking to perfection right now, and the smell alone emanating from the oven is making me "go bananas" with anticipation.
I have a real thing for breads/desserts with bananas, chocolate and/or peanut butter as its main ingredients. Any combination will do just fine. I seriously spend a few nights per week scouring the internet for recipes. Google Search: Banana Peanut Butter/Chocolate ______, then click! click! click! on links in search if the most delicious concoctions out there. So, it's no surprise that this particular banana bread recipe called my name. I saw it and I said, "you are mine, alllllll mine." And the rest is history.
I found this recipe from the awesome new blog I discovered called Orangette (more about that later). Here it is, in all it's glory. And I must say, it a complete cinch to make!
Chocolate Banana Bread With Cinnamon & Sugar Topping:
3 ripe bananas
2 large eggs
1 1/2 cups unbleached flour
1 cup granulated sugar
1 tsp. baking soda
2 tsp. cinnamon
1 tsp. pure vanilla extract
1 cup semisweet chocolate chips
For topping:
2 tbsp. granulated sugar
1/8 tsp. cinnamon
Preheat the oven to 375 degrees. Butter or spray 8 inch bread pan.
In medium mixing bowl, mash bananas well with a fork. Add the eggs and stir well to combine. Add the flour, sugar, baking soda, cinnamon and vanilla. Add 3/4 cup of chocolate chips and stir. Pour the batter into prepared pan.
Bake for 35-40 minutes (although mine took quite a while longer), OR until a toothpick comes out clean. Let cool for 15 minutes.
This bread is a-mazing warmed up for about 25 seconds in the microwave with a little butter on top. After Eric's first bite, he became weak in the knees, fell to the floor and said "you must make this every day." That's how good it is.
Subscribe to:
Posts (Atom)